- Cursive Alphabets
- Cursive L
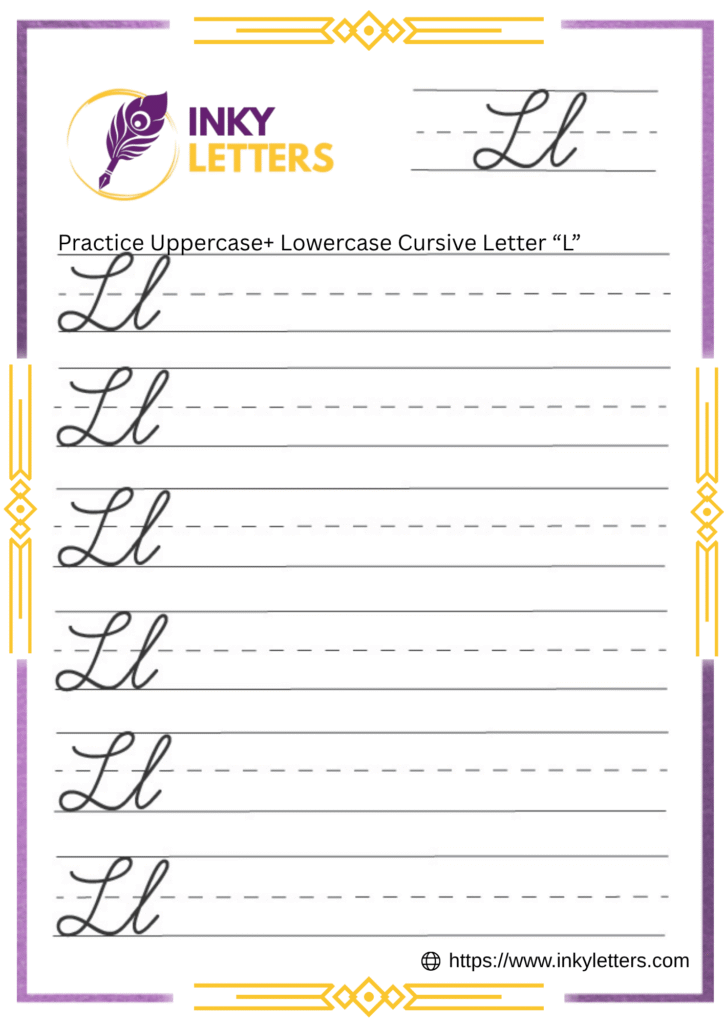
Cursive L Tutorial and Worksheet (Uppercase + Lowercase)
On this page, you will learn how to write uppercase cursive L and lowercase cursive l step by step. You’ll also get free printable and downloadable cursive L worksheets for tracing and practice.
Download Cursive L Worksheet
Ready to begin writing cursive L? First, download the cursive L worksheet and follow the steps below. These printable sheets will help you trace both uppercase and lowercase L to build control and confidence.
How to Write L in Cursive
The cursive L is one of the most graceful letters of the alphabet. Its tall and smooth flow makes it a favorite for names and decorative writing. Let’s learn how to write both lowercase l and uppercase L in cursive!
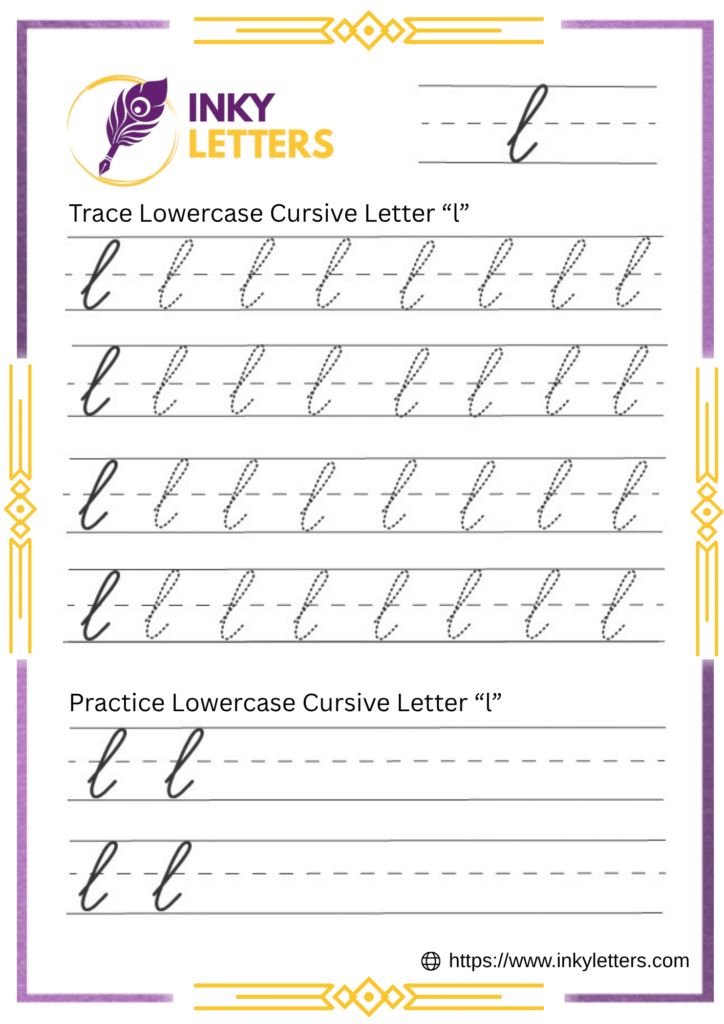
Lowercase Cursive l
The lowercase cursive l is a simple, elegant letter. Start at the bottom line and make a tall, straight upward stroke to the top line, then curve straight back down to the baseline. Finish with a small curve to the right to connect. Keep the stroke tall and straight to avoid it looking like an ‘e’ or ‘i’.
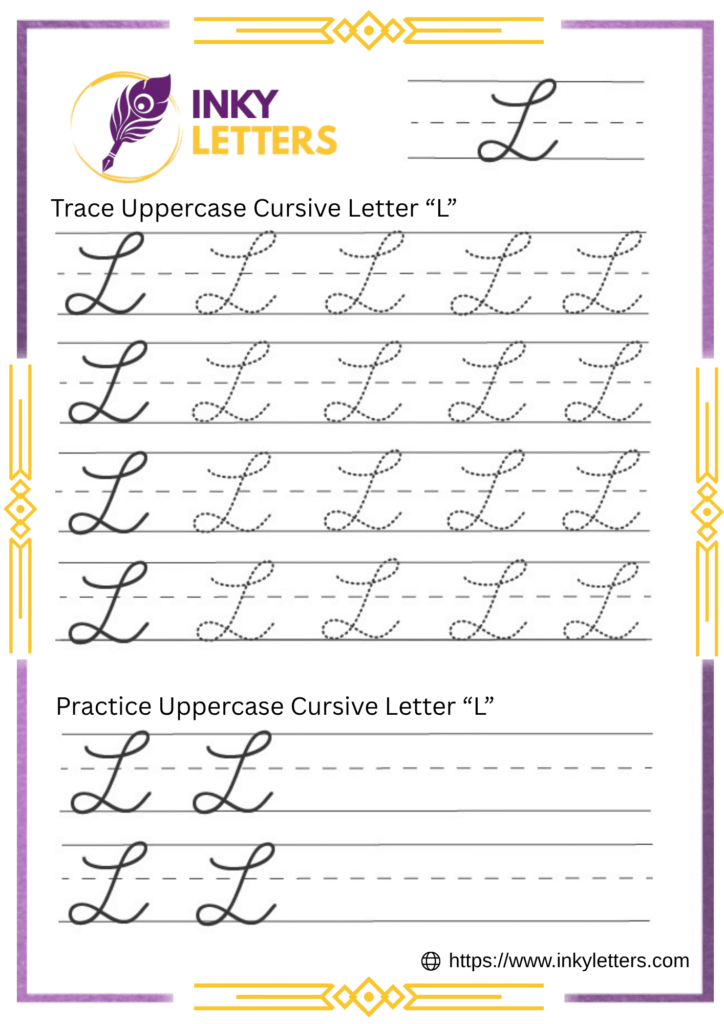
Uppercase Cursive L
Start at the top line and create a large loop that curves left and swings downward. Continue with a long, graceful curve that sweeps out to the right, ending just above the baseline.
The key to this ribbon-like letter is keeping the loops open and balanced. Practice slowly to maintain a steady hand and smooth rhythm.
How to Connect Cursive L to Other Letters
Cursive writing is all about flow; each letter connects smoothly to the next. Learning how to join cursive L with other letters helps your writing look polished and consistent.
How to Connect Lowercase Cursive l
easy to join with both short and tall letters.
How it connects:
- l + a / o / e: Keep your final curve short and roll right into the round letter.
- l + i / u / y: Move the curve slightly up before transitioning into the next stroke.
- l + t / h / k: Lift gently and slide upward to match the tall height of the next letter.
Download practice worksheets:
- Joining Letters: la, le, li, lo, lu.
- Cursive Words: lake, leaf, love, light, luck.
How to Connect Uppercase Cursive L
Uppercase L often stands alone, especially when used at the start of a name or title. However, you can connect it to other letters for a continuous, flowing look.
Ways to join uppercase cursive L:
- L + a / e: Begin the next letter close to the lower right curve of L.
- L + i / o: Use a small linking stroke from the bottom of L into the next loop.
- L + u / y: Extend the end slightly upward to start the next letter seamlessly.
Download practice worksheets:
- Joining Letters: La, Le, Li, Lo, Lu.
- Cursive Words: Lily, Lemon, Lucky, Love, Light.
Here’s What Most People Ask Us
Start at the bottom line, draw a straight line upward to the top, then loop slightly and follow the same line back down. End with a small rightward stroke for linking.
It can, but it doesn’t have to. Many writers lift their pencil after completing the uppercase L, especially in names. If you choose to connect it, make sure the ending stroke curves softly into the next letter.
Making the loop too wide or leaning the stroke too much. Keep your upstroke and downstroke close together, and make sure the loop stays narrow for neat, balanced writing.
Begin with lowercase l because it’s more common in everyday writing. Once you’re comfortable with it, move on to uppercase L to add elegance to names and titles.
Practice slow, steady strokes and keep your wrist relaxed. Focus on even spacing and consistent line height. Using lined worksheets helps keep your letters straight and uniform.