- Cursive Alphabets
- Cursive R
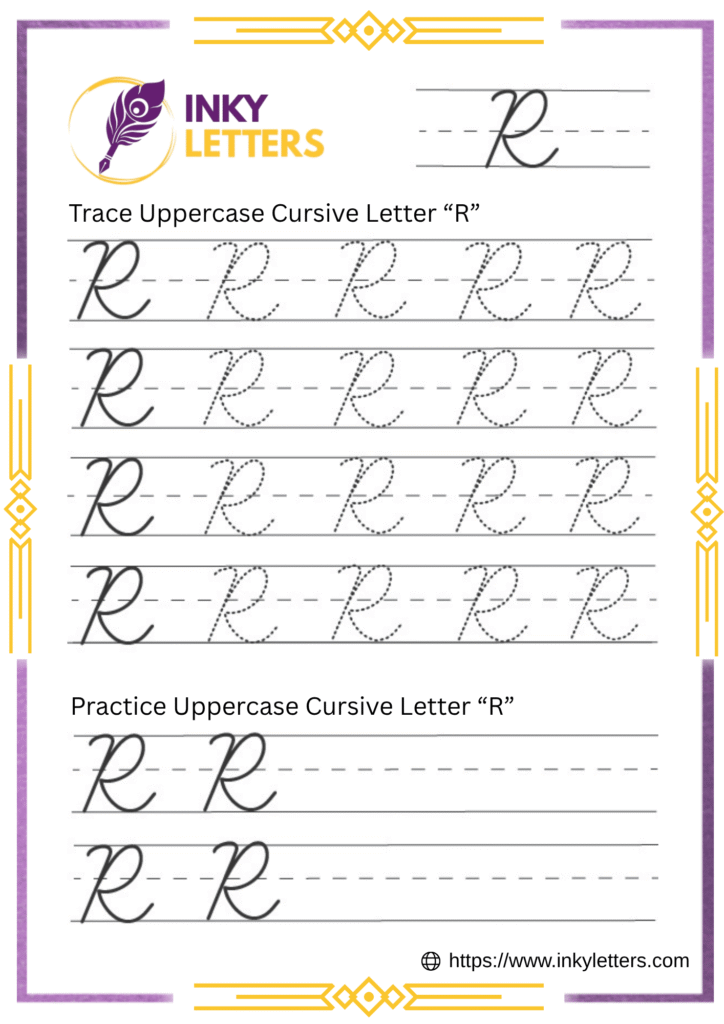
Cursive R Tutorial and Worksheet (Uppercase + Lowercase)
On this page, you’ll learn how to write uppercase cursive R and lowercase cursive r step by step. You’ll also get free printable cursive R worksheets for tracing and handwriting practice. Whether you’re a beginner or teaching kids, our cursive worksheets make it easy to master the letter R in cursive.
Download Cursive R Worksheet
Ready to begin writing cursive R? First, download the free cursive R worksheet PDF and start tracing. These cursive tracing worksheets include both uppercase and lowercase R.

How to Write R in Cursive
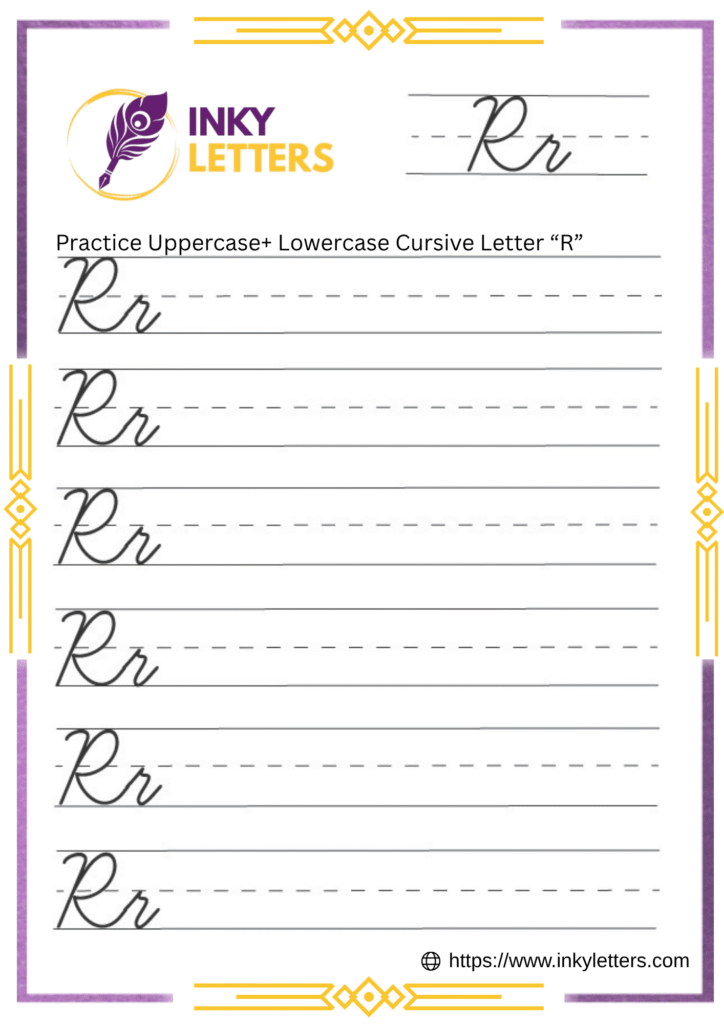
The cursive R is a graceful letter that flows beautifully in cursive handwriting. The uppercase cursive R has an elegant loop and curved leg, while the lowercase cursive r is simple and quick to write. Both versions connect smoothly with other cursive letters and look great in names or cursive words.
Lowercase Cursive R
The lowercase cursive r is one of the easiest and quickest letters to learn in cursive writing. It’s small, rounded, and connects smoothly with most other letters, making it perfect for flowing handwriting. To write it, start at the baseline and make a short upward stroke that reaches the midline.
Then dip the line slightly and bring it back down again in a gentle curve. Finally, finish with a small exit stroke curving to the right, allowing an easy connection to the next letter in a word.
Uppercase Cursive R
The uppercase cursive R is bold and smooth, with soft curves that make it look elegant. Start with a tall upward loop that reaches the top line, then pull a straight line down to the baseline. From the top, make a gentle curved arm that moves to the right. Finish with a long leg that angles slightly outward. Keep the loop and arm balanced so the letter stays clear and stylish. It’s perfect for names like Rachel, Ryan, or Riley.
How to Connect Cursive R to Other Letters
Once you know how to form cursive R, the next step is learning to connect it with other letters. Proper connections make your handwriting look smooth and consistent. We’ll look at how both lowercase and uppercase R connect with the rest of the alphabet.
How to Connect Lowercase Cursive r
Lowercase cursive r ends with a soft exit stroke, making it easy to join with almost any letter that follows.
How it connects:
- r + a / o / e: Curve naturally into the round letter.
- r + i / u: Keep the motion soft and upward for a seamless link.
- r + l / h / k: Move slightly higher to reach tall letters.
Download practice worksheets:
- Joining Letters: ra, re, ri, ro, ru, rl, rh.
- Cursive Words: rain, read, road, rule, ride, right.
How to Connect Uppercase Cursive R
The uppercase cursive R often stands alone, especially when used at the beginning of proper nouns or cursive titles. However, it can connect to the next letter if written with a flowing stroke.
How it connects:
- R + a / e / o: Begin the next letter close to the right leg of R.
- R + l / y / i: Extend a short line from the leg to transition smoothly.
Download practice worksheets:
- Joining Letters: Ra, Re, Ro, Ri, Ry.
- Cursive Words: Rose, Ryan, River, Ruby, Robin.
Here’s What Most People Ask Us
That’s exactly how it’s meant to look. The lowercase cursive r has a simple, upright curve without any loop, making it appear like a small bump. This design helps it flow quickly and neatly within words.
Yes, it should. The ending stroke of cursive r curves slightly upward, allowing it to connect smoothly to the next letter, especially vowels like a, e, or i, without needing to lift your pencil.
It starts like a cursive P but finishes differently. After forming the top loop, the uppercase cursive R includes a diagonal leg that extends down and outward, creating its own distinct, elegant cursive shape.
Not at all! The lowercase cursive r is one of the simplest cursive letters to master. With just a few upward and downward strokes, it can be learned quickly through tracing practice and cursive writing exercises.