- Cursive Alphabets
- Cursive I
Cursive I Tutorial and Worksheet (Uppercase + Lowercase)
On this page, you will learn how to write I in cursive. You’ll also get free printable and downloadable cursive I worksheets for tracing and practice.
Download Cursive I Worksheet
Ready to start writing cursive I? First, download the cursive I worksheet and then follow the steps below.
How to Write I in Cursive
The cursive I is one of the easiest letters to write in cursive handwriting. It has clean, simple strokes and connects smoothly with other letters. Once you learn the basic movements, both uppercase and lowercase, you will feel natural at writing. Let’s look at how to write big I and small i correctly!
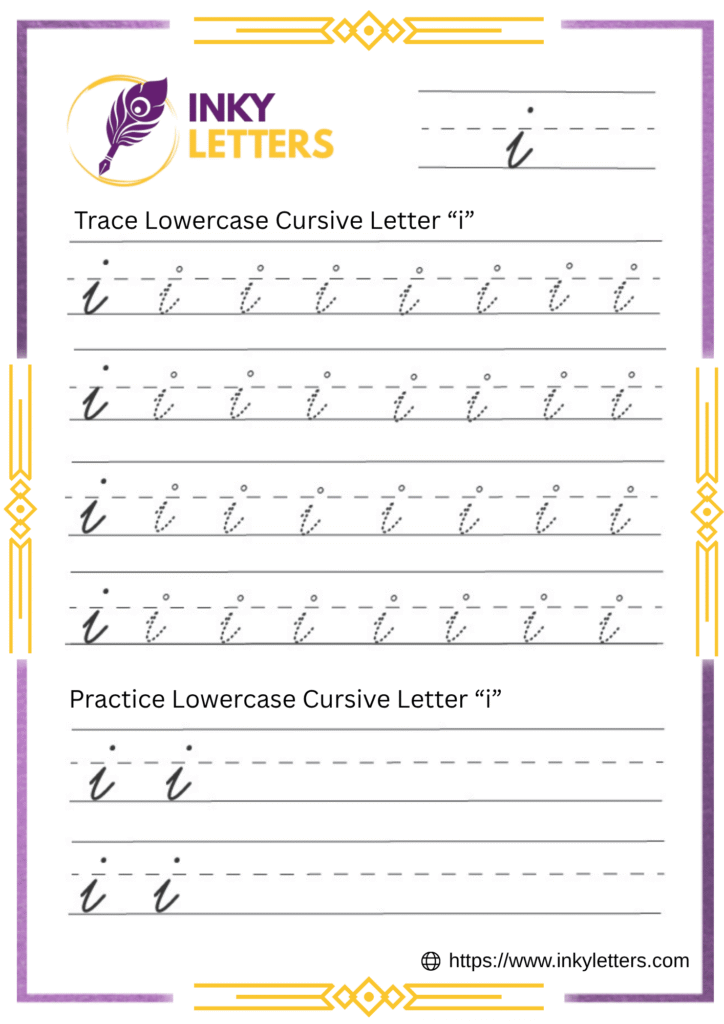
Lowercase Cursive i
To write the lowercase cursive i, start at the bottom line and move your pencil upward to the midline, forming a gentle curve to the right. Then, bring the line straight back down to the baseline in a smooth motion.
Lift your pencil and place a small, neat dot just above the midline to finish the letter. The lowercase i is simple yet elegant, and its small dot gives it a distinct look.
Be sure to keep the dot small and placed directly above the stem so your writing stays clean and balanced.
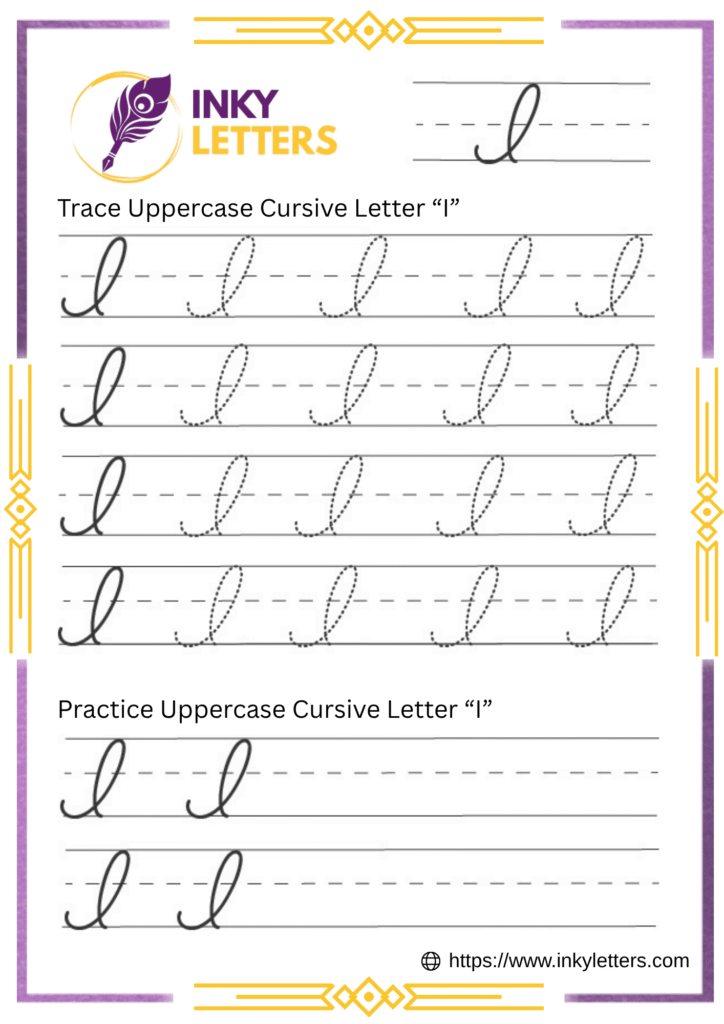
Uppercase Cursive I
To write the uppercase cursive I, start at the top line and make a short upward curve to the left. Then, bring your pencil down in a straight stroke to the baseline. At both the top and bottom, add gentle loops or curls to give the letter a graceful cursive style.
The uppercase cursive I looks elegant and slightly fancy, often used at the beginning of names, titles, or sentences such as Ivy, Island, or India.
Make sure the loops are not too wide, keep them balanced so your letter appears neat, clean, and even.
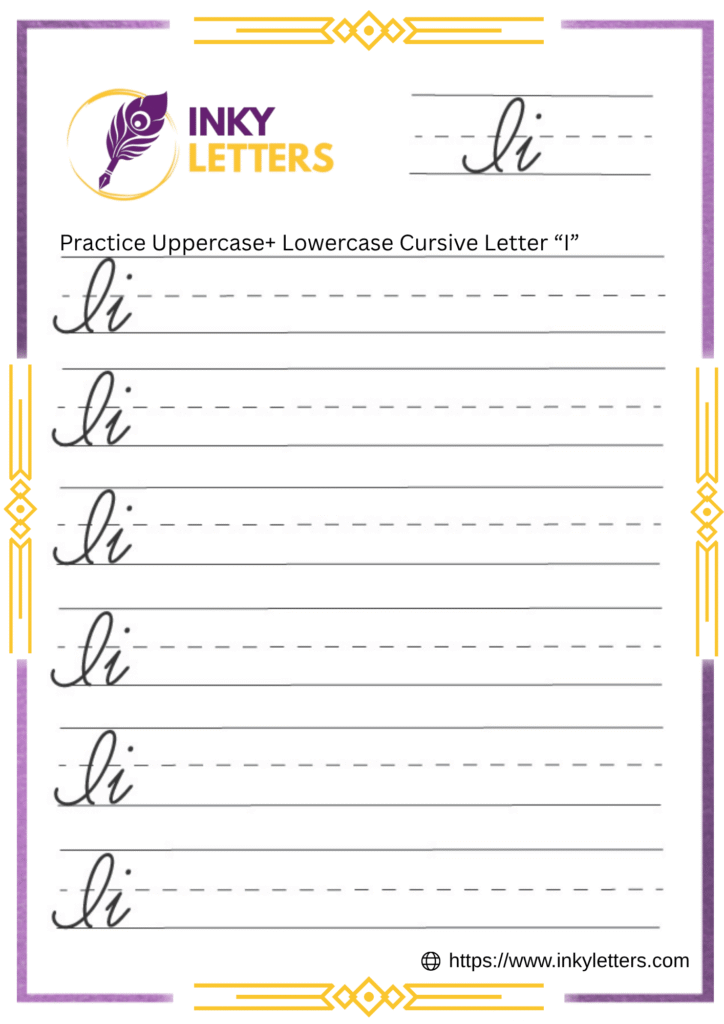
How to Connect Cursive I to Other Letters
Once you’ve learned to write the cursive i, the next step is connecting it smoothly with other letters. Proper connections make your handwriting faster and more natural.
How to Connect Lowercase Cursive i
The lowercase i ends with a small rightward curve. This helps you join it to the next letter without lifting your pencil.
How it connects:
- i + n / m: The small curve flows into the next hump easily.
- i + t / l: Move slightly upward to join the tall letter.
- i + g / s: Keep the motion soft and natural for a smooth connection.
Download practice worksheets:
- Joining Letters: in, im, it, il, ig, is
- Cursive Words: ink, hill, lift, mint, iris, fish
How to Connect Uppercase Cursive I
Most of the time, uppercase I stands alone, especially at the start of sentences or names. However, it can connect to other letters in continuous cursive writing if you want to add style.
Ways to join uppercase cursive I:
- I + n / s: Start the next letter close to the bottom curve.
- I + t / l: Add a small linking line from the lower part of the I.
- I + g / e: Flow from the lower end of I into the loop of the next letter.
Download practice worksheets:
- Joining Letters: In, Is, It, Il, Ie
- Cursive Words: Ice, Iris, India, Iron, Idea
Here’s What Most People Ask Us
Print I is made with straight lines and no connecting strokes, while cursive I includes soft curves or loops and connects smoothly with other letters for a flowing handwriting style.
Practice writing cursive I for at least 10–15 minutes a day. Start by tracing dotted letters, then move to writing without guides. Regular, short sessions help improve handwriting faster than long, irregular practice.
Yes! The lowercase cursive i connects smoothly with most letters like n, t, l, and s. The small rightward curve at the end makes it easy to join words such as ink, it, is, and hill.